
Locations
The Locations feature helps you organize different areas within a site, making it easier to manage assets and monitor equipment at a more granular level. Each location belongs to a specific site and represents a physical area where devices or assets are installed.
Typical use cases include:
- Office rooms
- Factory floors
- Production departments
- Warehouses
- Utility rooms
- Building sections
By assigning assets to locations, you can improve organization, simplify monitoring, and quickly identify where equipment is installed.
Create a Location
Section titled “Create a Location”Follow these steps to add a new location:
- Navigate to Admin from the top navigation bar.
- Select Locations from the left sidebar.
- Click New Location in the upper-right corner.
- Enter the required location details:
- Location Name (e.g., Office)
- Description (e.g., Main Office Area)
- Room (e.g., Room 101)
- Floor / Section (e.g., Ground Floor)
- Area / Department (e.g., West Wing)
- Building (e.g., Building A)
- Select the Site to which the location belongs.
- Click Save to create the location.
Location Creation
Section titled “Location Creation”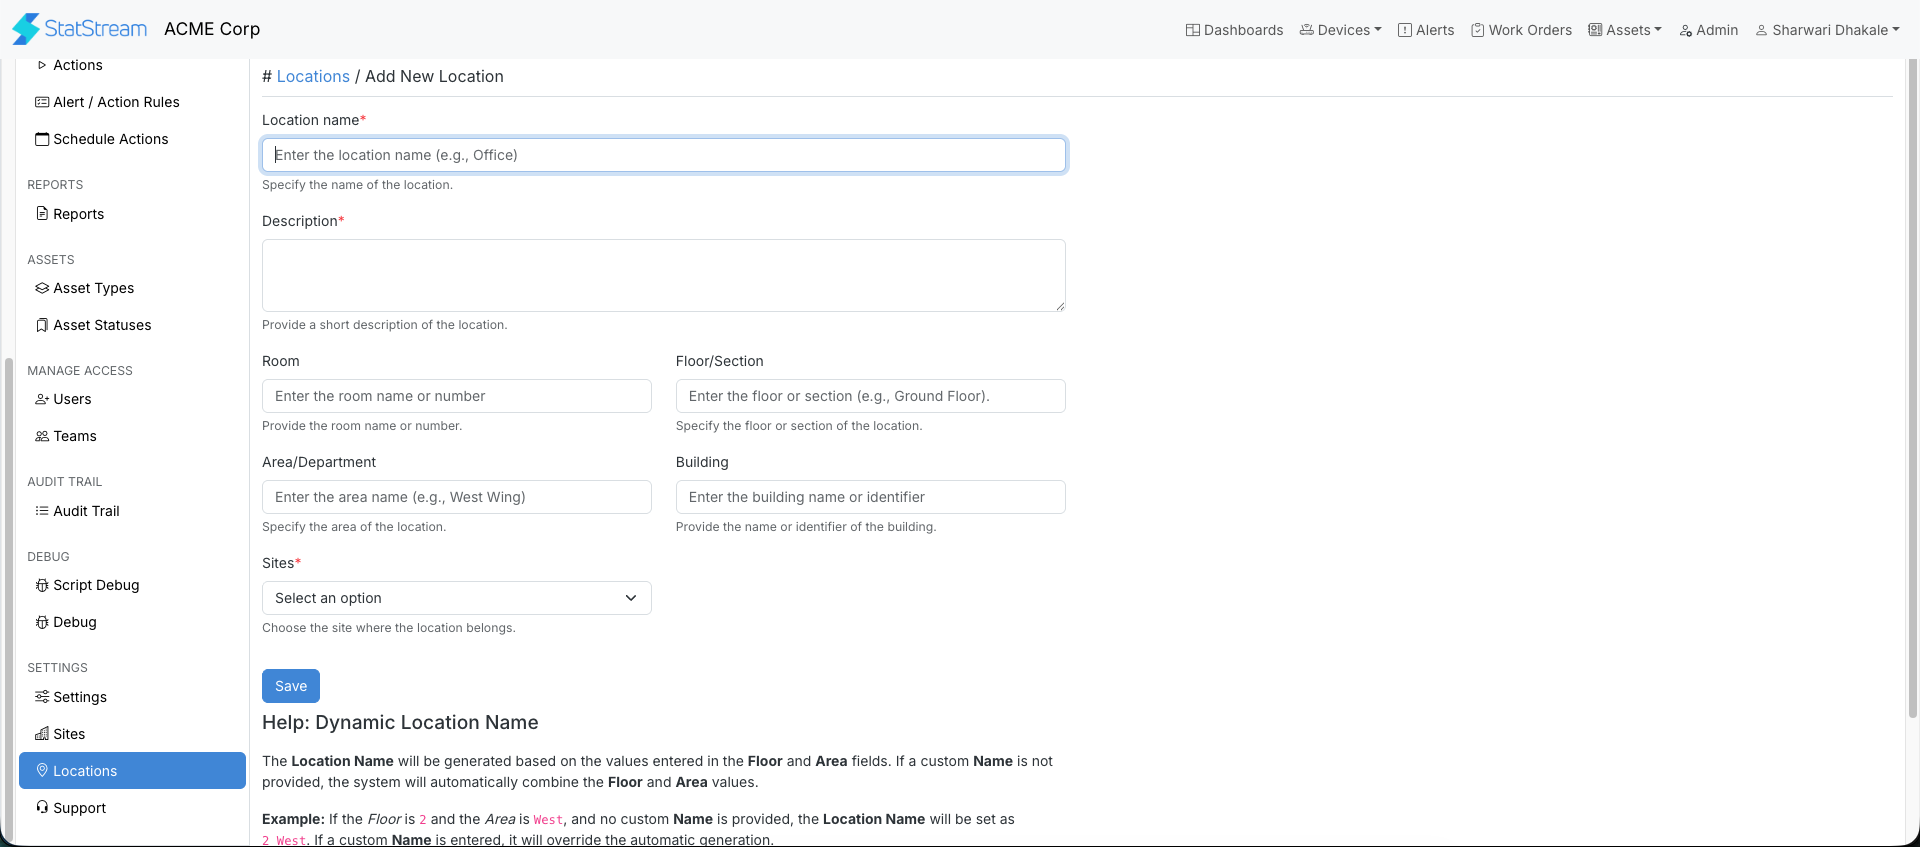
Best Practices
Section titled “Best Practices”To keep your locations organized and easy to manage:
- Use clear and descriptive names for each location.
- Assign every location to the correct site before saving.
- Follow a consistent naming convention across all buildings and departments.
- Include room, floor, or department details to make locations easier to identify.
- Create separate locations only when they represent distinct physical areas.